 My Intelligent Financeالعربية
User guide
Every everyday task, step by step, with pictures of the screens. Tap a task to open it.
Getting started
Set up the app the first time
- Open the app. Set up opens by itself.
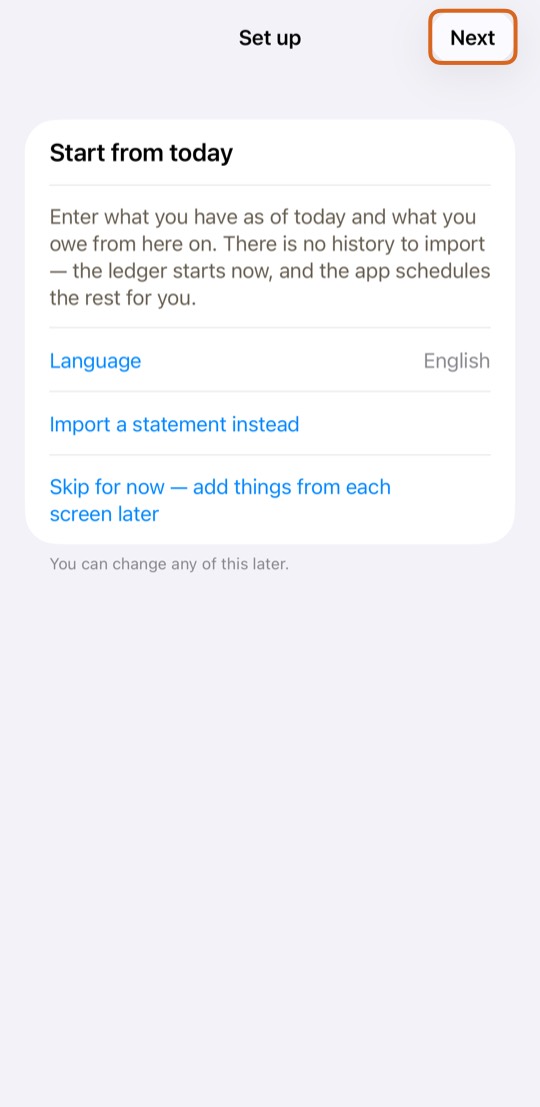
- Tap Next to go from one step to the next. Tap Back to change something.
- Under Accounts, type each bank account: its name, its Last four digits and its Balance today. Tap Add after each one.
- Under Cards, add each card the same way, with its last four digits and what it is Owed today.
- Under Income, turn on Salary, type the amount and the day it is Paid on day.
- Add what you pay every month, then tap Go to Today.
You should now see Today, with your accounts and what is due.
Cash goes in as an account of the type Cash. You can skip any step and add things later from each screen.
Run setup again
- Open Settings (under More).
- Tap Run setup again.
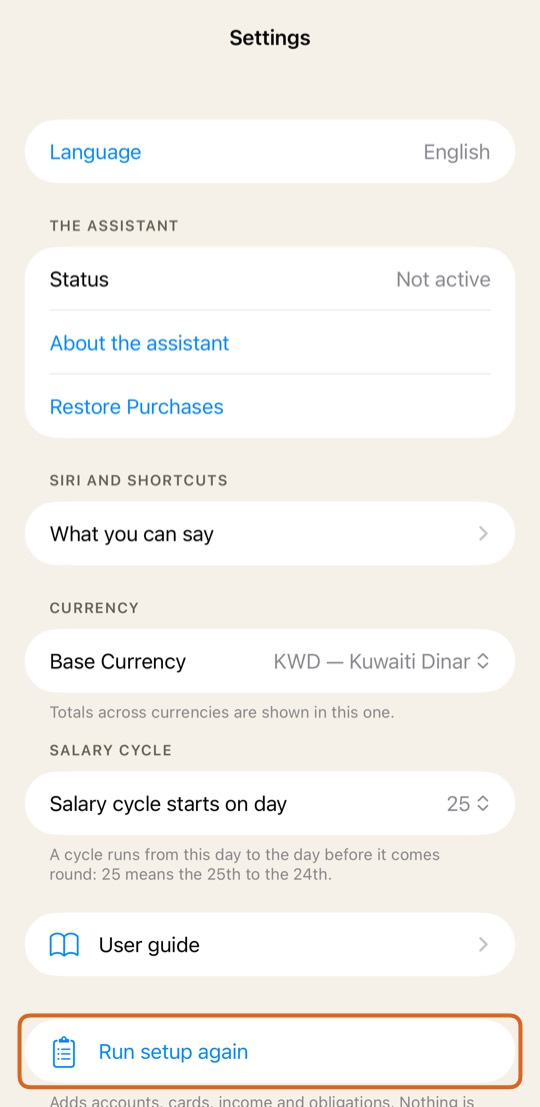
- Add the accounts, cards, income or obligations you missed, then finish.
You should now see what you added beside everything you had. Nothing is deleted or replaced.
Change the language
- Open Settings and tap Language.
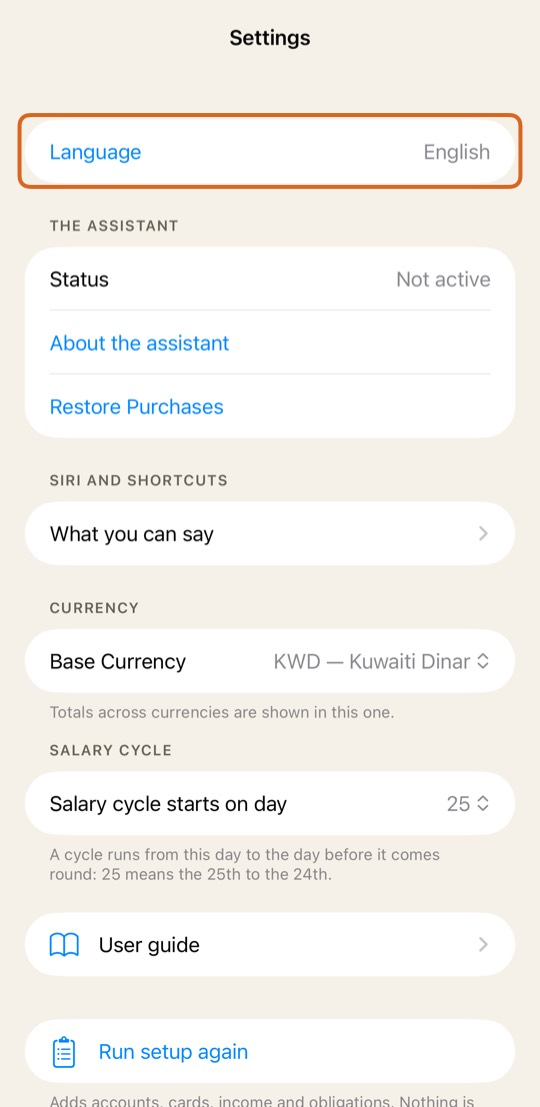
- The iPhone's Settings open at this app. Choose English or Arabic, then come back.
You should now see the app in the language you chose, Siri included.
Accounts and cards
Add an account
- Open Accounts and tap Add, then Add account.
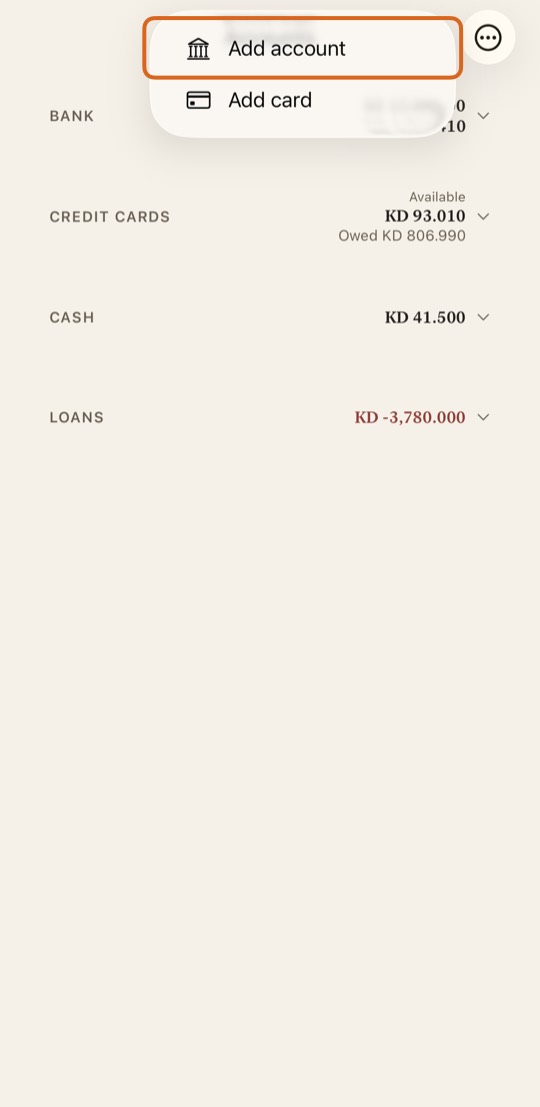
- Type its name, currency, last four digits and today's balance.
- Tap Save.
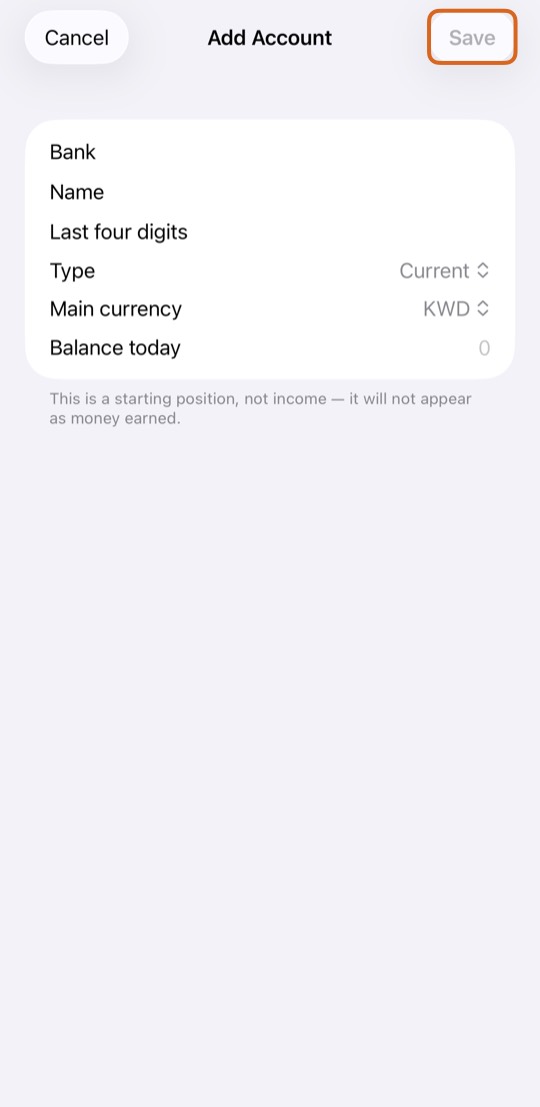
You should now see the account under Bank or Cash.
Add a card
- Open Accounts and tap Add, then Add card.
- Type the card's name, its last four digits, its limit, and the account that pays it.
- Tap Save.
You should now see the card under Credit cards, with what it owes and what is available.
Add the account the card is paid from first: a card needs it.
Change an account
- Open Accounts and tap the account.
- Change its opening balance, its date, or its Last 4 digits.
- Tap Save.
You should now see the account's balance worked out from the new figures.
Change, archive or delete a card
- Open Accounts and tap the card.
- Change its Card name, Last 4 digits or Credit limit.
- A card you no longer use: tap Archive this card. Its history stays.
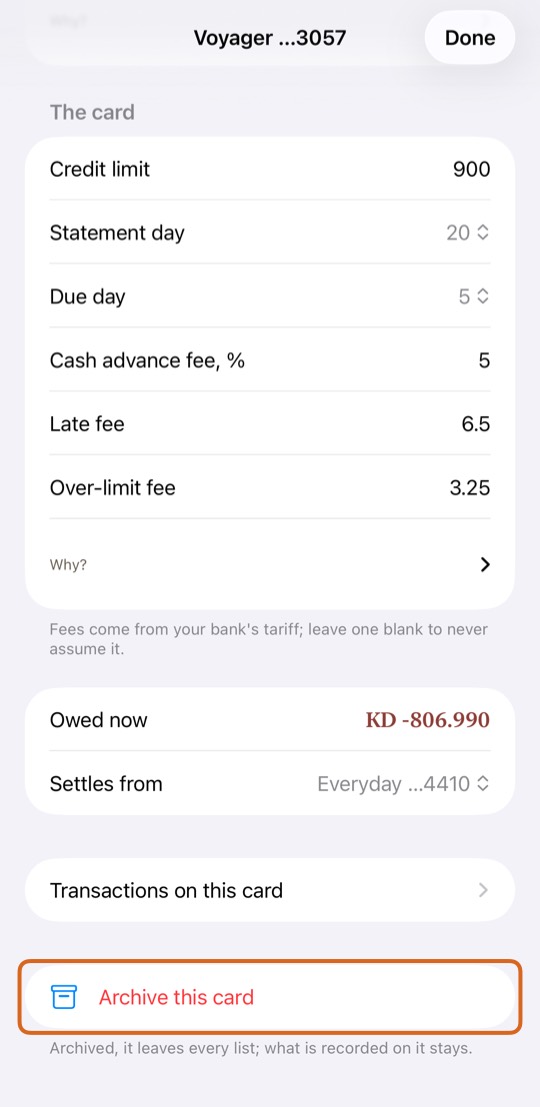
- A card added by mistake, with nothing on it: tap Delete this card.
You should now see the card changed, or gone from Accounts.
What a card's figures mean
- On Accounts, each card shows Available: how much more you can spend on it.
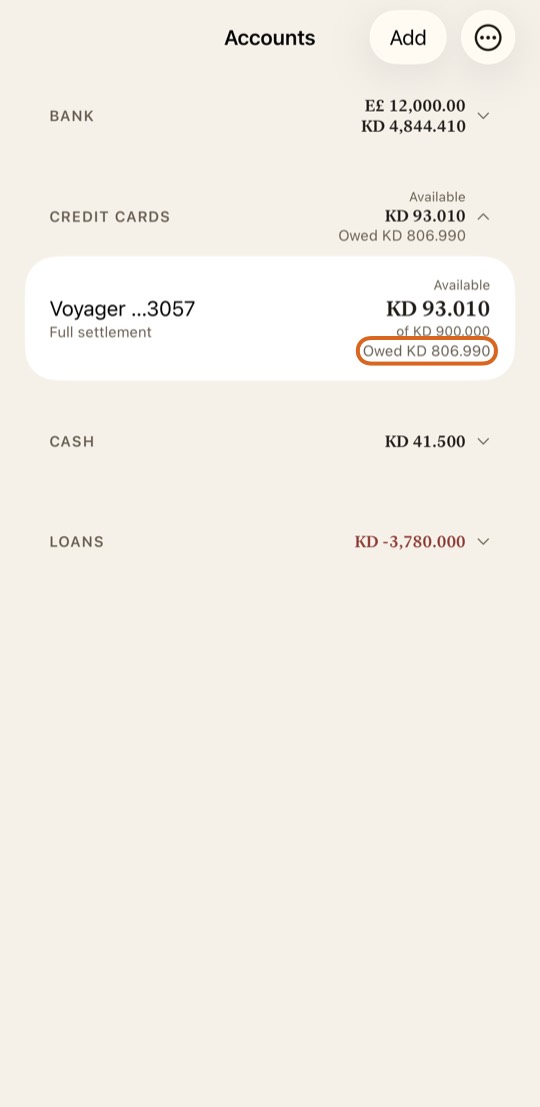
- Below it, Owed is what you owe the bank on it today.
- Available is never counted as money you have. It is only room on the card.
You should now see the same owed figure as your bank, once your card is matched to its statement.
A debit card
- A debit card takes money straight from its account, so it has no row of its own on Accounts.
- Add it in setup under Cards as Debit, with the account it Draws on.
- When you record a purchase, choose it under Pay with.
You should now see the purchase taken from the account the card draws on.
Recording money
Record an expense, an income or a transfer
- On Today, tap the + button, or Add at the top.
- Type the amount. Choose Spent, Received or Transfer.
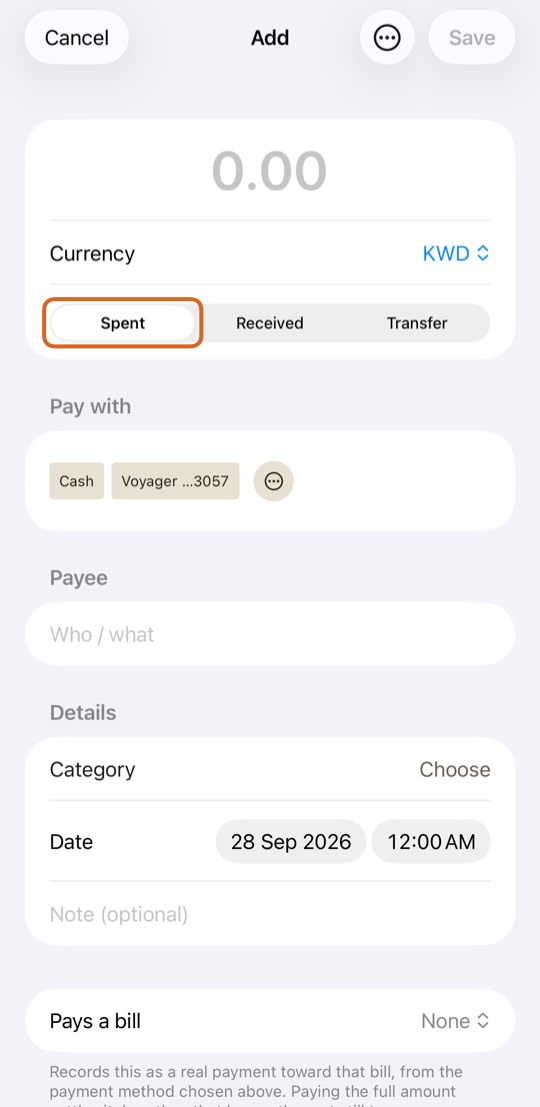
- For spending, choose what you paid with under Pay with, and who it was for. For a transfer, choose From and To.
- Tap Save.
You should now see the balance of the account or card change on Today.
An expense in another currency
- Add the expense and choose its currency. A section about the foreign currency appears.
- If you know what your bank charged, choose I know the amount charged and type it.
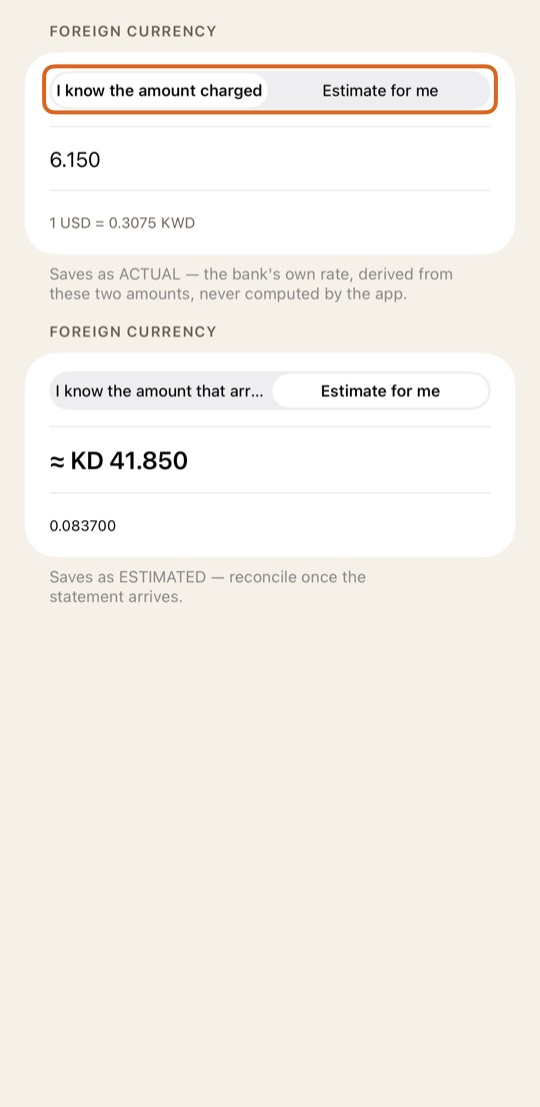
- If you don't know yet, choose Estimate for me. The app uses today's rate.
- Tap Save.
You should now see the expense in your own currency. An estimate is marked Estimated until the statement shows the real figure.
Match to statement replaces an estimate with the bank's figure.
Change or delete a transaction
- Open Transactions (under More) and tap the transaction.
- Change what is wrong and tap Save.
- To remove it, tap Delete this transaction and confirm.
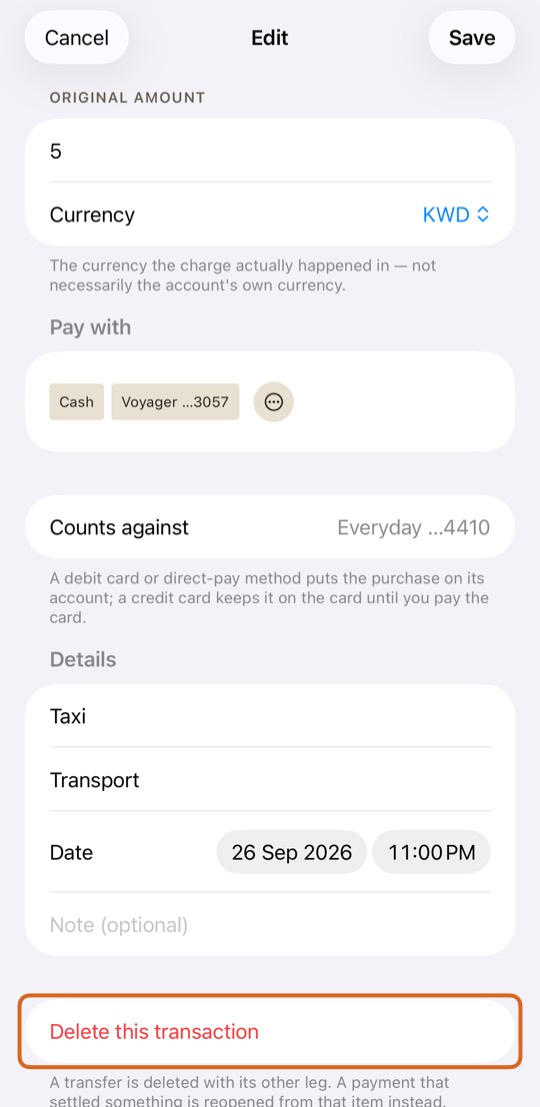
You should now see the list and the balances without it, or with your change.
See one period's transactions
- Open Transactions.
- Tap Date and choose a period, such as This cycle or Last month.
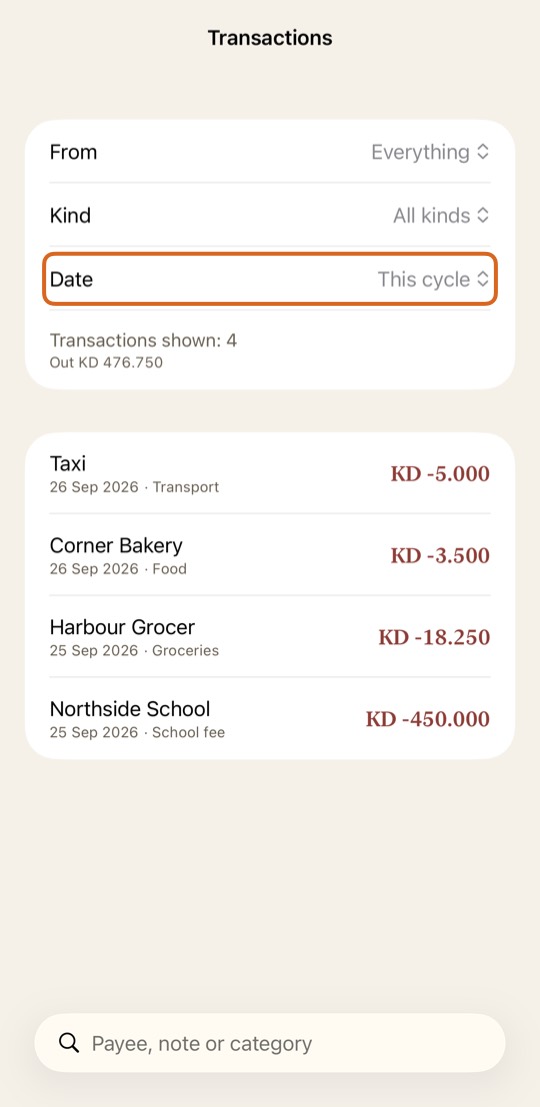
- Tap Clear to see everything again.
You should now see only that period's transactions, with their count and totals.
Scan a receipt, or type it in words
- Open Add. Tap its ⋯ menu.
- Tap Scan a receipt and take a photo, or tap Type it in words and write, for example, "taxi 5 cash".
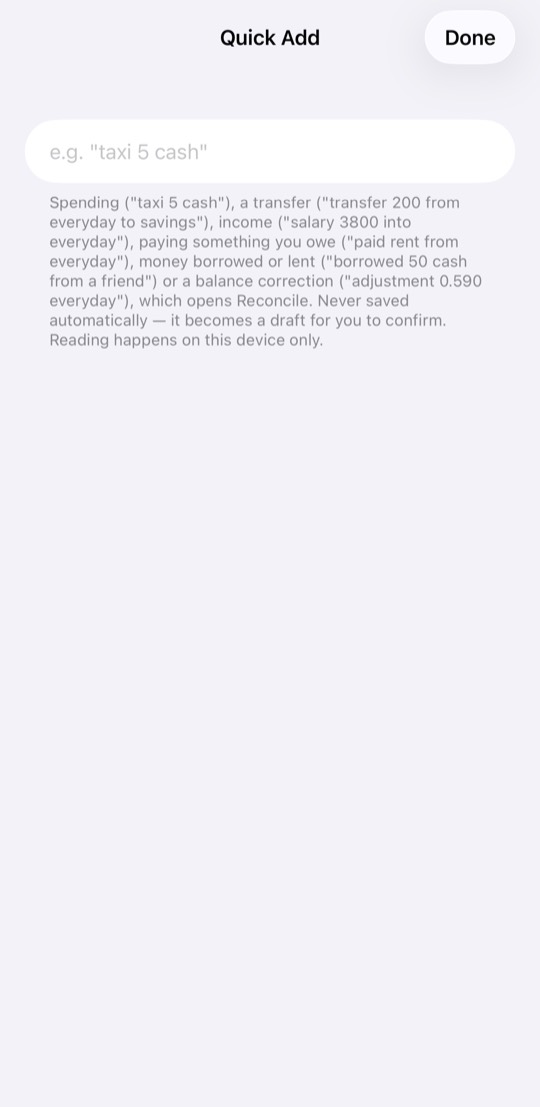
- Check what the app filled in, then save it.
You should now see the expense recorded, as if you had typed it in.
These two appear only on an iPhone that runs Apple Intelligence.
Obligations
Add an obligation
- Open Obligations and tap Add.
- Type who it is for under Beneficiary, the amount and the Due date.
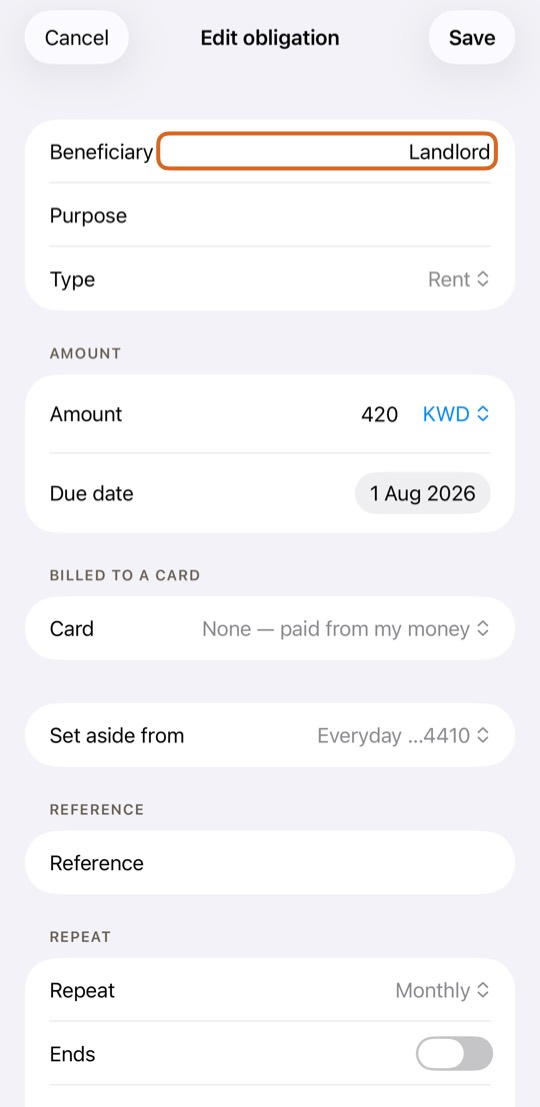
- Under Repeat, choose Once or how often it comes back.
- Under Set aside from, check the account the money will come from.
- Tap Save.
You should now see it in Obligations, and on Today when it is due.
Pay an obligation, in full or in part
- On Today, or in Obligations, tap Settle… beside it.
- Check the Amount. Change it to pay only part.
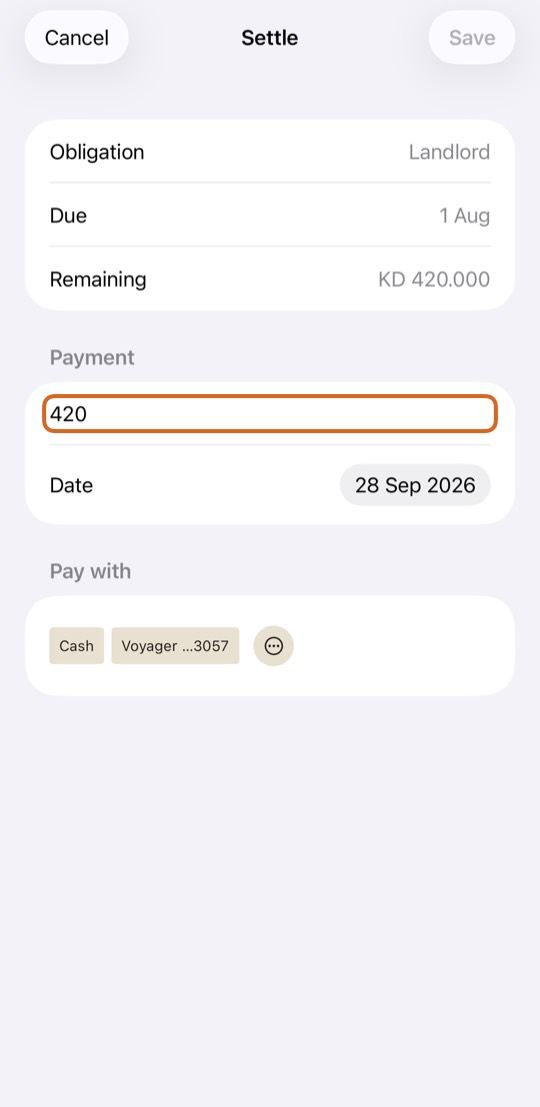
- Choose what you paid with under Pay with.
- For part of it, choose what happens to The rest: Carry forward, Write off, or Add the rest to the next payment.
- Tap Save, then Confirm.
You should now see it paid, or "Part paid" with what is left.
Cancel one payment
- On Today, tap the payment in Due.
- Tap Cancel this payment….
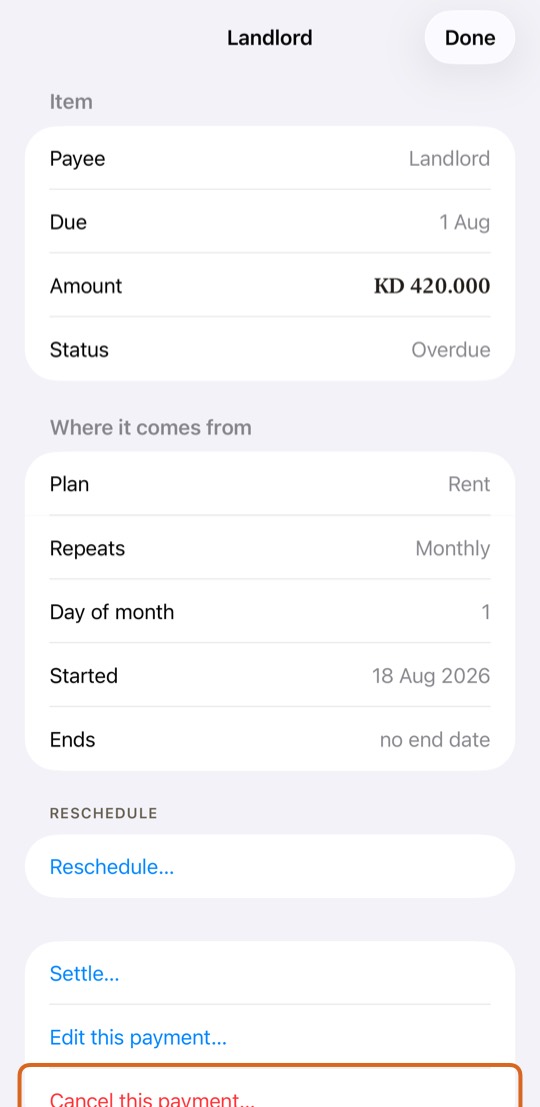
- Type why, then tap Cancel it.
You should now see that payment cancelled. The ones after it are not touched.
Change the amount of a repeating payment
- Open the obligation and tap Edit this payment….
- Type the new amount and tap Save.
- Choose This payment only, or This and the following ones.
You should now see the new amount where you chose. Paid and cancelled payments never change.
An obligation billed to a card
- Add or open the obligation.
- Under Billed to a card, choose the Card.
- Tap Save.
You should now see it added to that card's bill, not taken from an account.
Today and Forecast
Read Today
- At the top, Bank, Credit cards, Cash and Loans show what you hold and owe. Tap one to see each account.
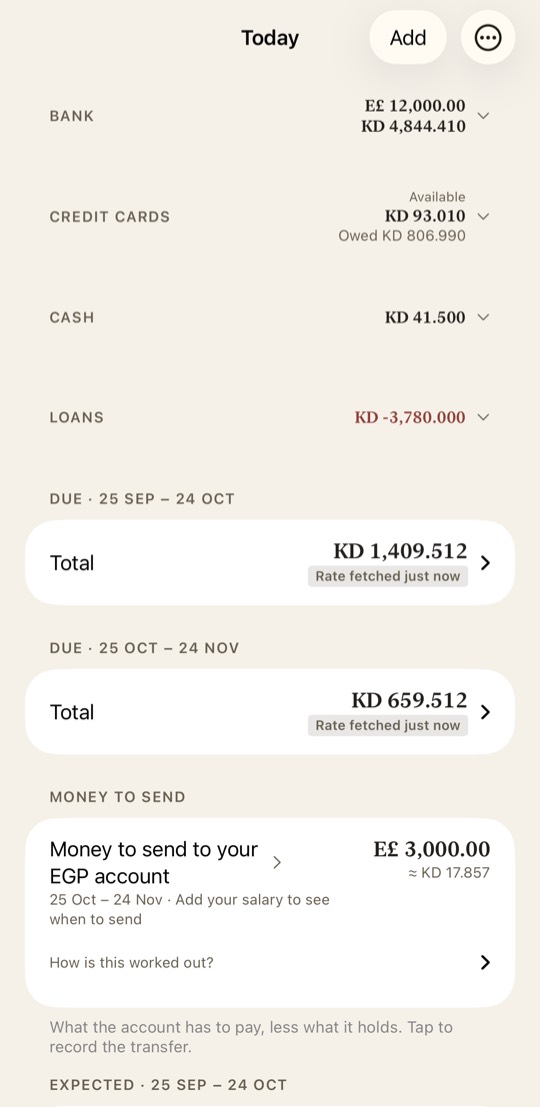
- Due lists what you have to pay this cycle and the next.
- The cards row says what your cards owe, and what to pay by when.
You should now know whether this cycle is covered, and what to pay next.
Money to send to another account
- When an account in another currency can't cover its own payments, Money to send says how much to send.
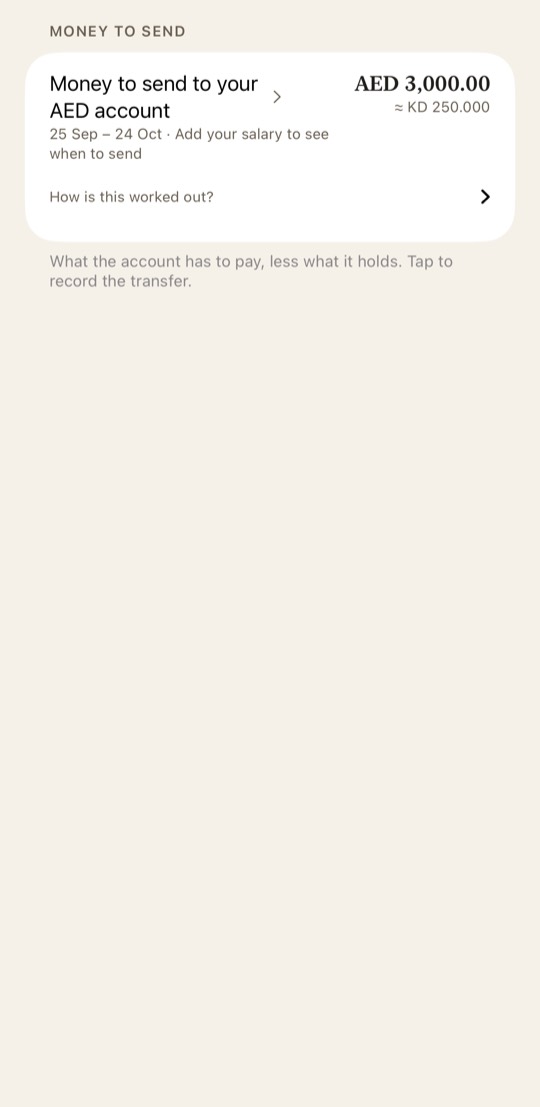
- Tap it. Add opens as a transfer with the figures filled in.
- Check them and tap Save.
You should now see the transfer recorded and the account covered.
Look ahead with Forecast
- Open Forecast.
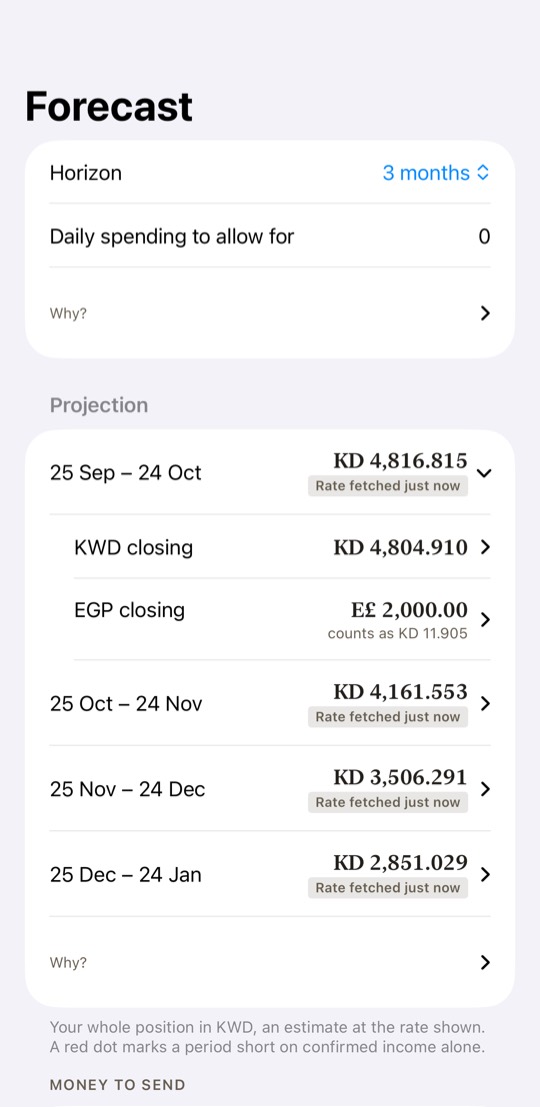
- Choose how far to look under Horizon.
- On Today, tap Each cycle, worked out to see every cycle's money in and out, line by line.
You should now see each cycle's balance ahead, and where it runs short.
The advisor
Use the advisor's suggestions
- When a cycle runs short, tap Advisor — ways through it on Today.
- Read the payments it suggests moving, and why.
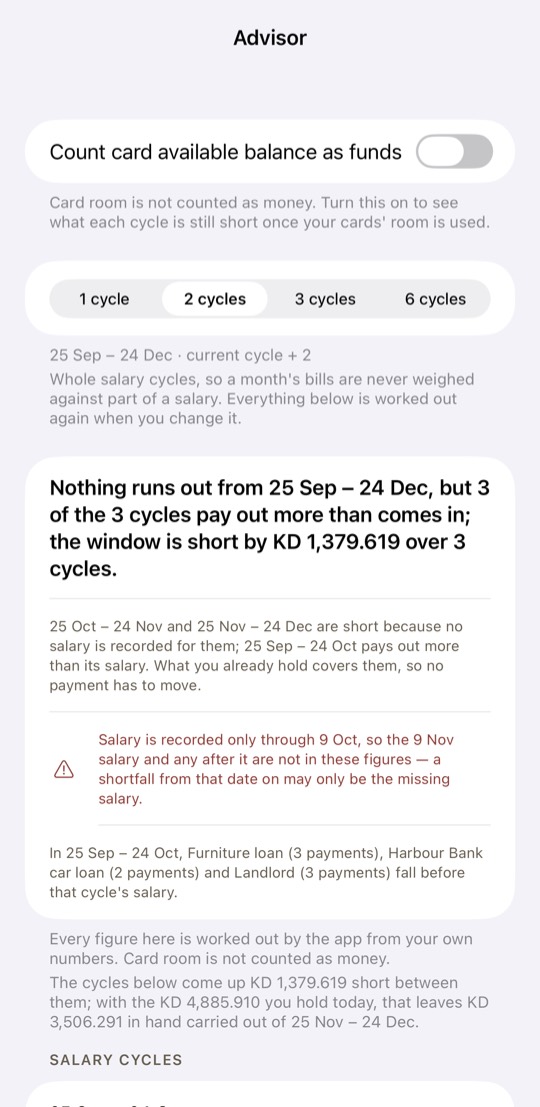
- Tick the ones you agree with, then tap Apply.
You should now see the moved payments on their new dates, and the cycle covered or less short.
The advisor only suggests. Nothing moves until you tap Apply.
Match to statement
Download your statements
- In your bank's online banking, download each card statement and each account statement as Excel (.xlsx) or CSV.
- NBK's are read as they are. For another bank, the first time, tap Set up its columns.
- Pending card items are not in the file. You type those in yourself.
You should now have the files in Files, ready to choose.
PDF is not supported yet: use Compare with a balance instead.
Match several statements at once
- Open Accounts, tap ⋯, then Match to statement.
- Tap Choose statements and pick every file at once.
- Each file is placed by the card or account number on it. Add the last four digits to each account and card first.
- Tap Match.
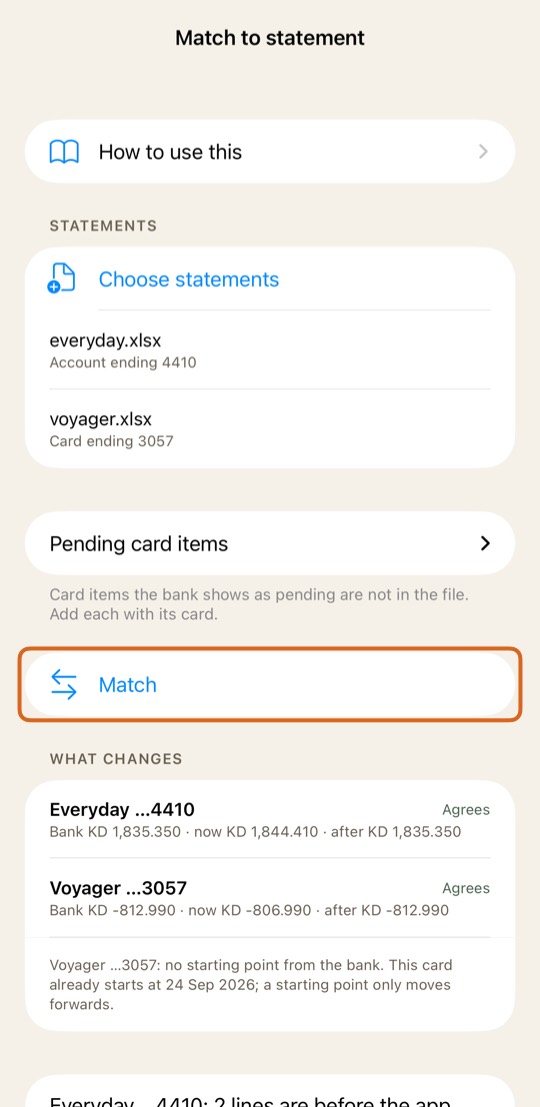
You should now see What changes for every account and card, and the groups below it.
Pending card items
- Open Pending card items.
- Choose the Card, type What it was, the Amount and the Date.
- Tap Add pending item, once for each.
You should now see the card agree with the bank's figure, pending items included.
Each group, and what to tick
- The card's starting point: where the card starts counting, worked out from the bank's own figures. Starts ticked.
- Matched: the app and the bank agree. Nothing to tick.
- Amount differs: the same purchase at a different figure; applying takes the bank's. Starts ticked.
- Probably the same: the app may already have this line. Check the one it chose. Starts unticked.
- In the bank only: the bank has it and the app doesn't; applying adds it. Starts ticked.
- In the app only: the app has it and the bank doesn't. It stays unless you tick it. A balancing entry starts ticked.
- Card payment recorded as an expense and Card purchase taken from an account: saved the wrong way; applying puts them right. Start ticked.
- Own transfers: money between your own accounts. Starts unticked.
- Tidy-up: rows that move no balance. Starts unticked.
- After the statement: what you added after the statement's last day. Never matched or counted.
- Left over: a correction for what is still different. Use it last.
You should now see, under What changes, each account and card's figure after the ticked changes.
Start an account at the bank's balance
- If a statement has lines before the account opened in the app, open the row that says so.
- Tap the first offer, Start on the day before them at the bank's balance. It is always right when the file has a running balance.
- Read the confirmation, then confirm. Put back the opening date undoes it.
You should now see those lines counted, and the account still agreeing.
Apply, and undo
- When every account and card shows Agrees, or you know why not, tap Apply.
- Confirm. Nothing you left unticked changes.
- If something is wrong, tap Undo this match. Everything goes back as it was.
You should now see your balances the same as the bank's.
Compare with a balance
- For a bank that sends only PDFs: open Accounts, tap ⋯, then Compare with a balance.
- Choose the account, the date, and type the Bank's stated balance.
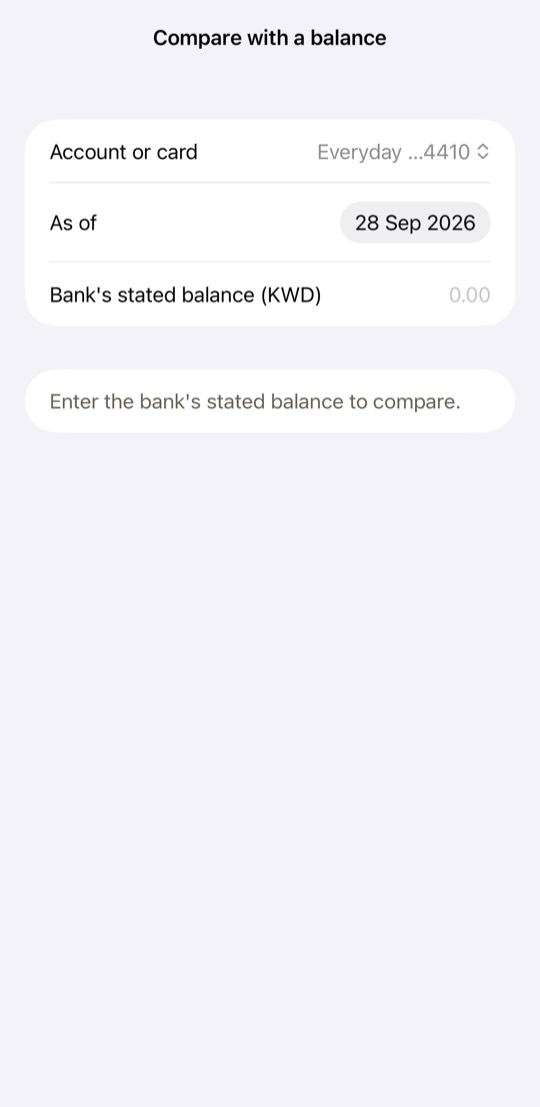
- If there is a difference you can't explain, tap Record a correction to match the bank.
You should now see the difference, or Reconciled.
A correction hides why the figures differed. Look for a missing or wrong transaction first.
Siri and Shortcuts
What you can say to Siri
- Open Settings and tap What you can say for every phrase.
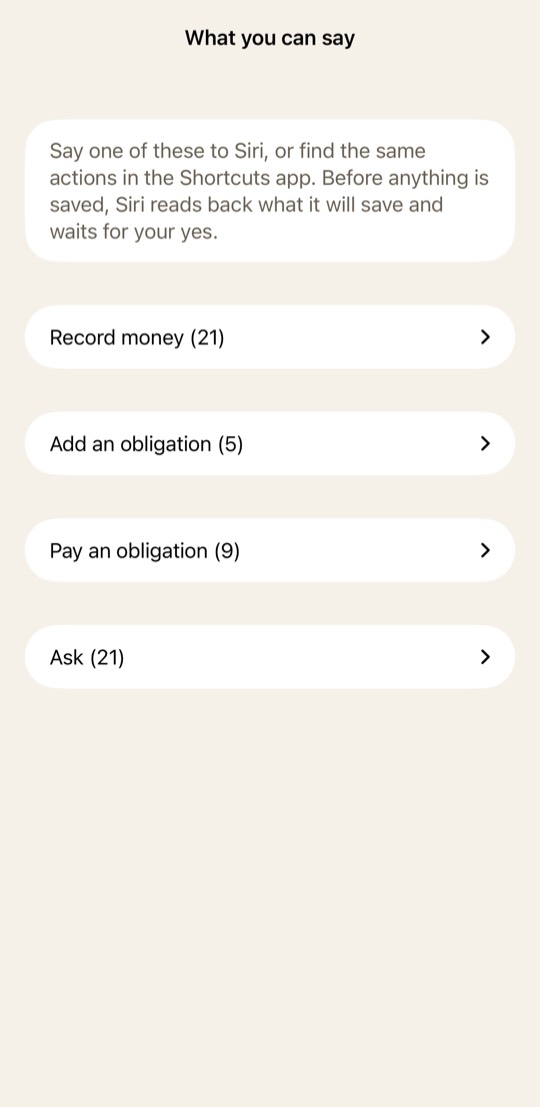
- Say, for example, "Add an expense in Intelligent Finance", "Pay an obligation in Intelligent Finance" or "What's due in Intelligent Finance".
- Siri asks for what is missing, one question at a time: how much, paid with, what for. Then it reads it back.
- Say yes to save it, or no to stop.
You should now see what Siri saved in the app, as if you had typed it.
When Siri itself is set to Arabic, say the Arabic phrases listed on the same screen.
Backup and safety
Export a backup
- Open Settings and tap Export My Data.
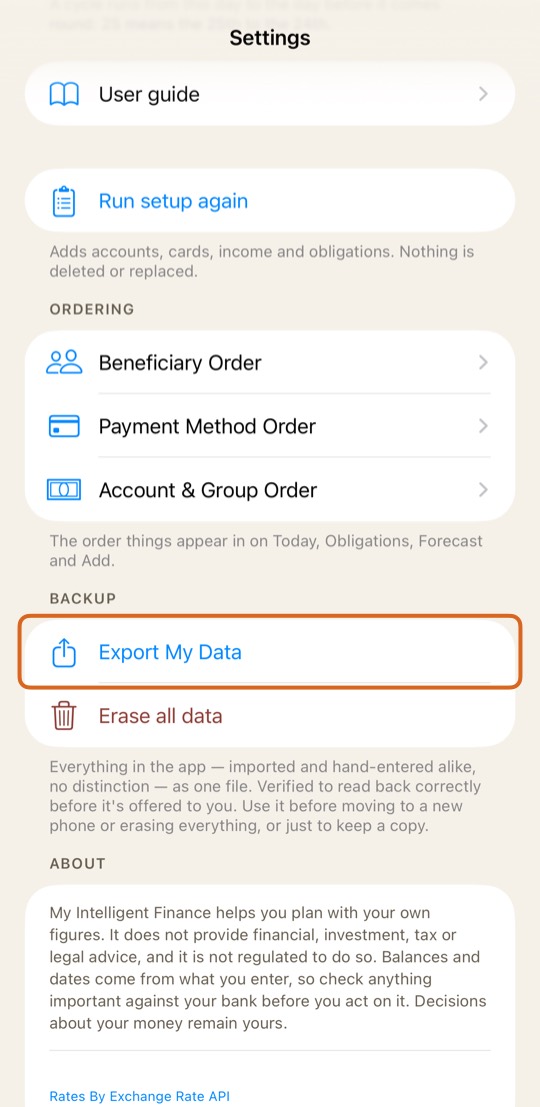
- Tap Share Export File and save it to Files, or send it somewhere safe.
You should now have one file with everything in the app, checked to read back correctly.
Restore a backup
- Restore works only in an empty app: after Erase all data, or on a new iPhone.
- Open Settings and tap Restore from a backup.
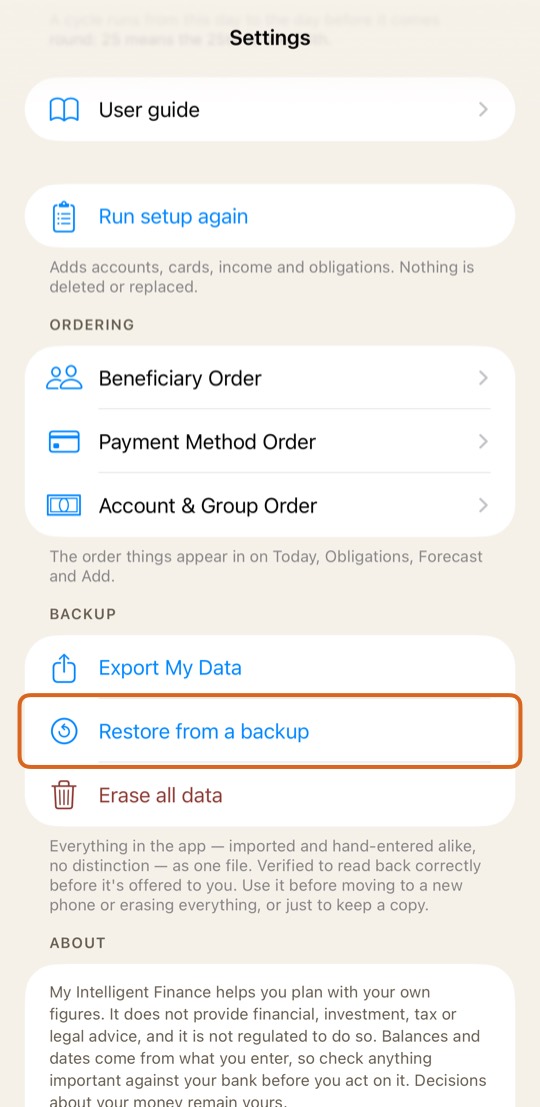
- Choose the backup file. Check the counts it shows, then tap Restore.
You should now see your accounts, obligations and transactions back, as they were.
A file from a newer version of the app is refused: update the app first.
Erase all data
- Open Settings and tap Erase all data.
- Tap Export a backup first, then Save the backup.
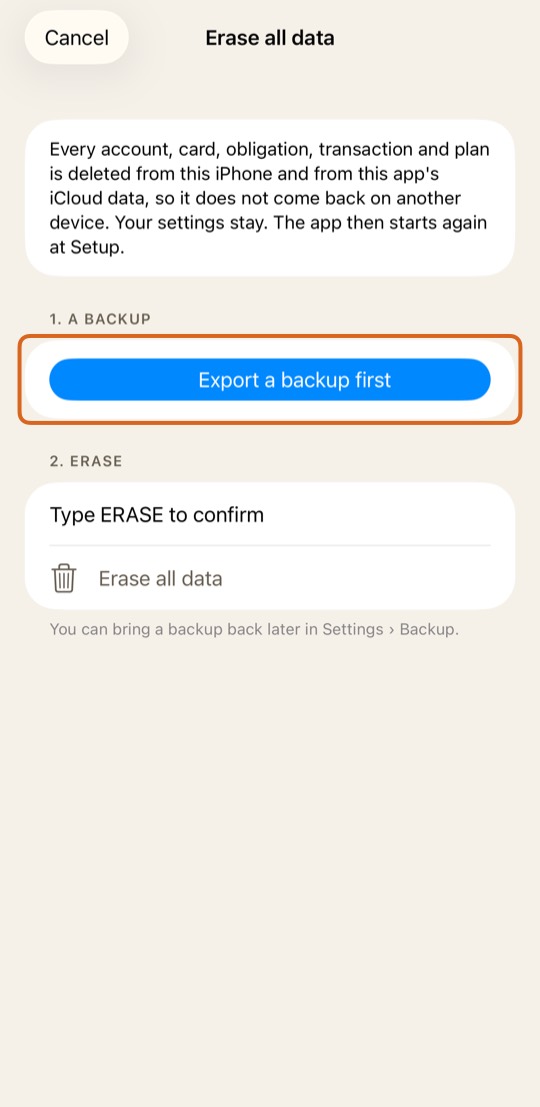
- Type the word it asks for, then tap Erase all data.
You should now see Setup, with nothing in the app, on this iPhone and in iCloud.
Questions
Why does a card show an estimate?
- A charge in another currency was saved with Estimate for me, so its figure uses today's rate, not your bank's.
- When the statement arrives, Match to statement replaces it with the bank's figure.
Why doesn't my balance match the bank?
- Payments you made after the statement's last day are not in it yet. Match to statement lists them under After the statement and doesn't count them.
- A card's pending items are not in the file. Add them under Pending card items.
- Anything else: Match to statement shows each line that differs, and what to do.
Which iPhones run the full advisor?
- The advisor's explanation is written by Apple Intelligence on the iPhone: an iPhone 15 Pro or newer, with Apple Intelligence turned on.
- On other iPhones the advisor shows the calculation on its own, which is complete, and says why.